Framework Mystery Box Laptop Repair
Quick Links
Framework Intro#
So Framework is a laptop company that sells repair-able laptops. The value proposition as I see it is that you get a laptop that focuses on user-servicable repairs and upgrades. While it might not be opimizing the “cost vs computational power vs battery life vs weight” metrics as heavily as other laptops are, you are getting something that, if Framework holds up its promise, if you break it in three years you don’t have to choose between getting a brand new laptop or just living with the broken one, or getting some dodgy third party parts if you’re lucky. Instead, if my laptop screen breaks I can go to framework and order a new one. Just the screen. Even if its not their latest product. And, if they don’t offer that screen any more, the “current” edition of the screen should still work with my laptop.
That’s the idea anyway, they’ve been faithfully chugging along for a few years now, and have a handful of iterations under their belt so it seems like they are prepared to deliver on this promise.
Mystery Boxes#
Separately, they also have been doing a few other unothodox things in the manufacturing space. For this project I’m focused on their mystery boxes. To quote the product page:
Framework Mystery Boxes contain a random assortment of returned parts and modules from our service centers. Rather than waste them, we want to give our community the opportunity to explore their own projects and creations. These are perfect for DIYers and tinkerers who like a challenge and want to experiment.
Put in other words, they sell you a handful of semi-random laptop parts that may be varying levels of broken, but at a price that makes it enticing for folks who either know how to repair things or want to learn and need projects.
Now this has been criticized as essentially crowd-sourcing e-waste disposal. Its fair to question how ordinary customers are intended to dispose of electronics they aren’t able to use, and perhaps Framework could do more to make sure customers purchasing these boxes are aware of the e-waste disposal options near them. That said this post is more about how neat I think this is and how useful it is for learning about electronics and laptops specifically, so we’ll sidestep that but I couldn’t make this post and not acknowledge the sustainability aspect and the need for responsible disposal.
Building a laptop from parts#
So naturally I was interested, but they only sell them occasionally, presumably they wait until they have a decent backlog of parts and then open the listing. Several times I’ve gotten the email that they are back in stock only to find them sold out as soon as I check. Such is the popularity of these things.
Eventually I was able to pick up a “small” box, and instantly regretted.. not getting more. There is plenty to be dissapointed with if you expect a fully functioning laptop out of these boxes, but if you come into it with an expectation that you’re going to get some broken parts and try to repair them over a long period of time then you’ll get what you expected.
My first order I received:
- 1 display
- 1 Input Cover
- 1 main chassis
I was very excited, this is basically a whole laptop! Except the functional parts… In reviewing the parts I didn’t notice anything unfixable about them. The input cover had a dent near the fingerprint reader, but “it’ll buff out”. The display was probably broken, based on what I read online about the mystery boxes these displays are rarely in good shape. But the main chassis looked good, and even included things like the audio board.
The next opportunity I ordered two more boxes, this time the “large” which include a motherboard.
- Two Motherboards
- Two Displays
- One main chassis
- Two Input covers
- One Top Cover
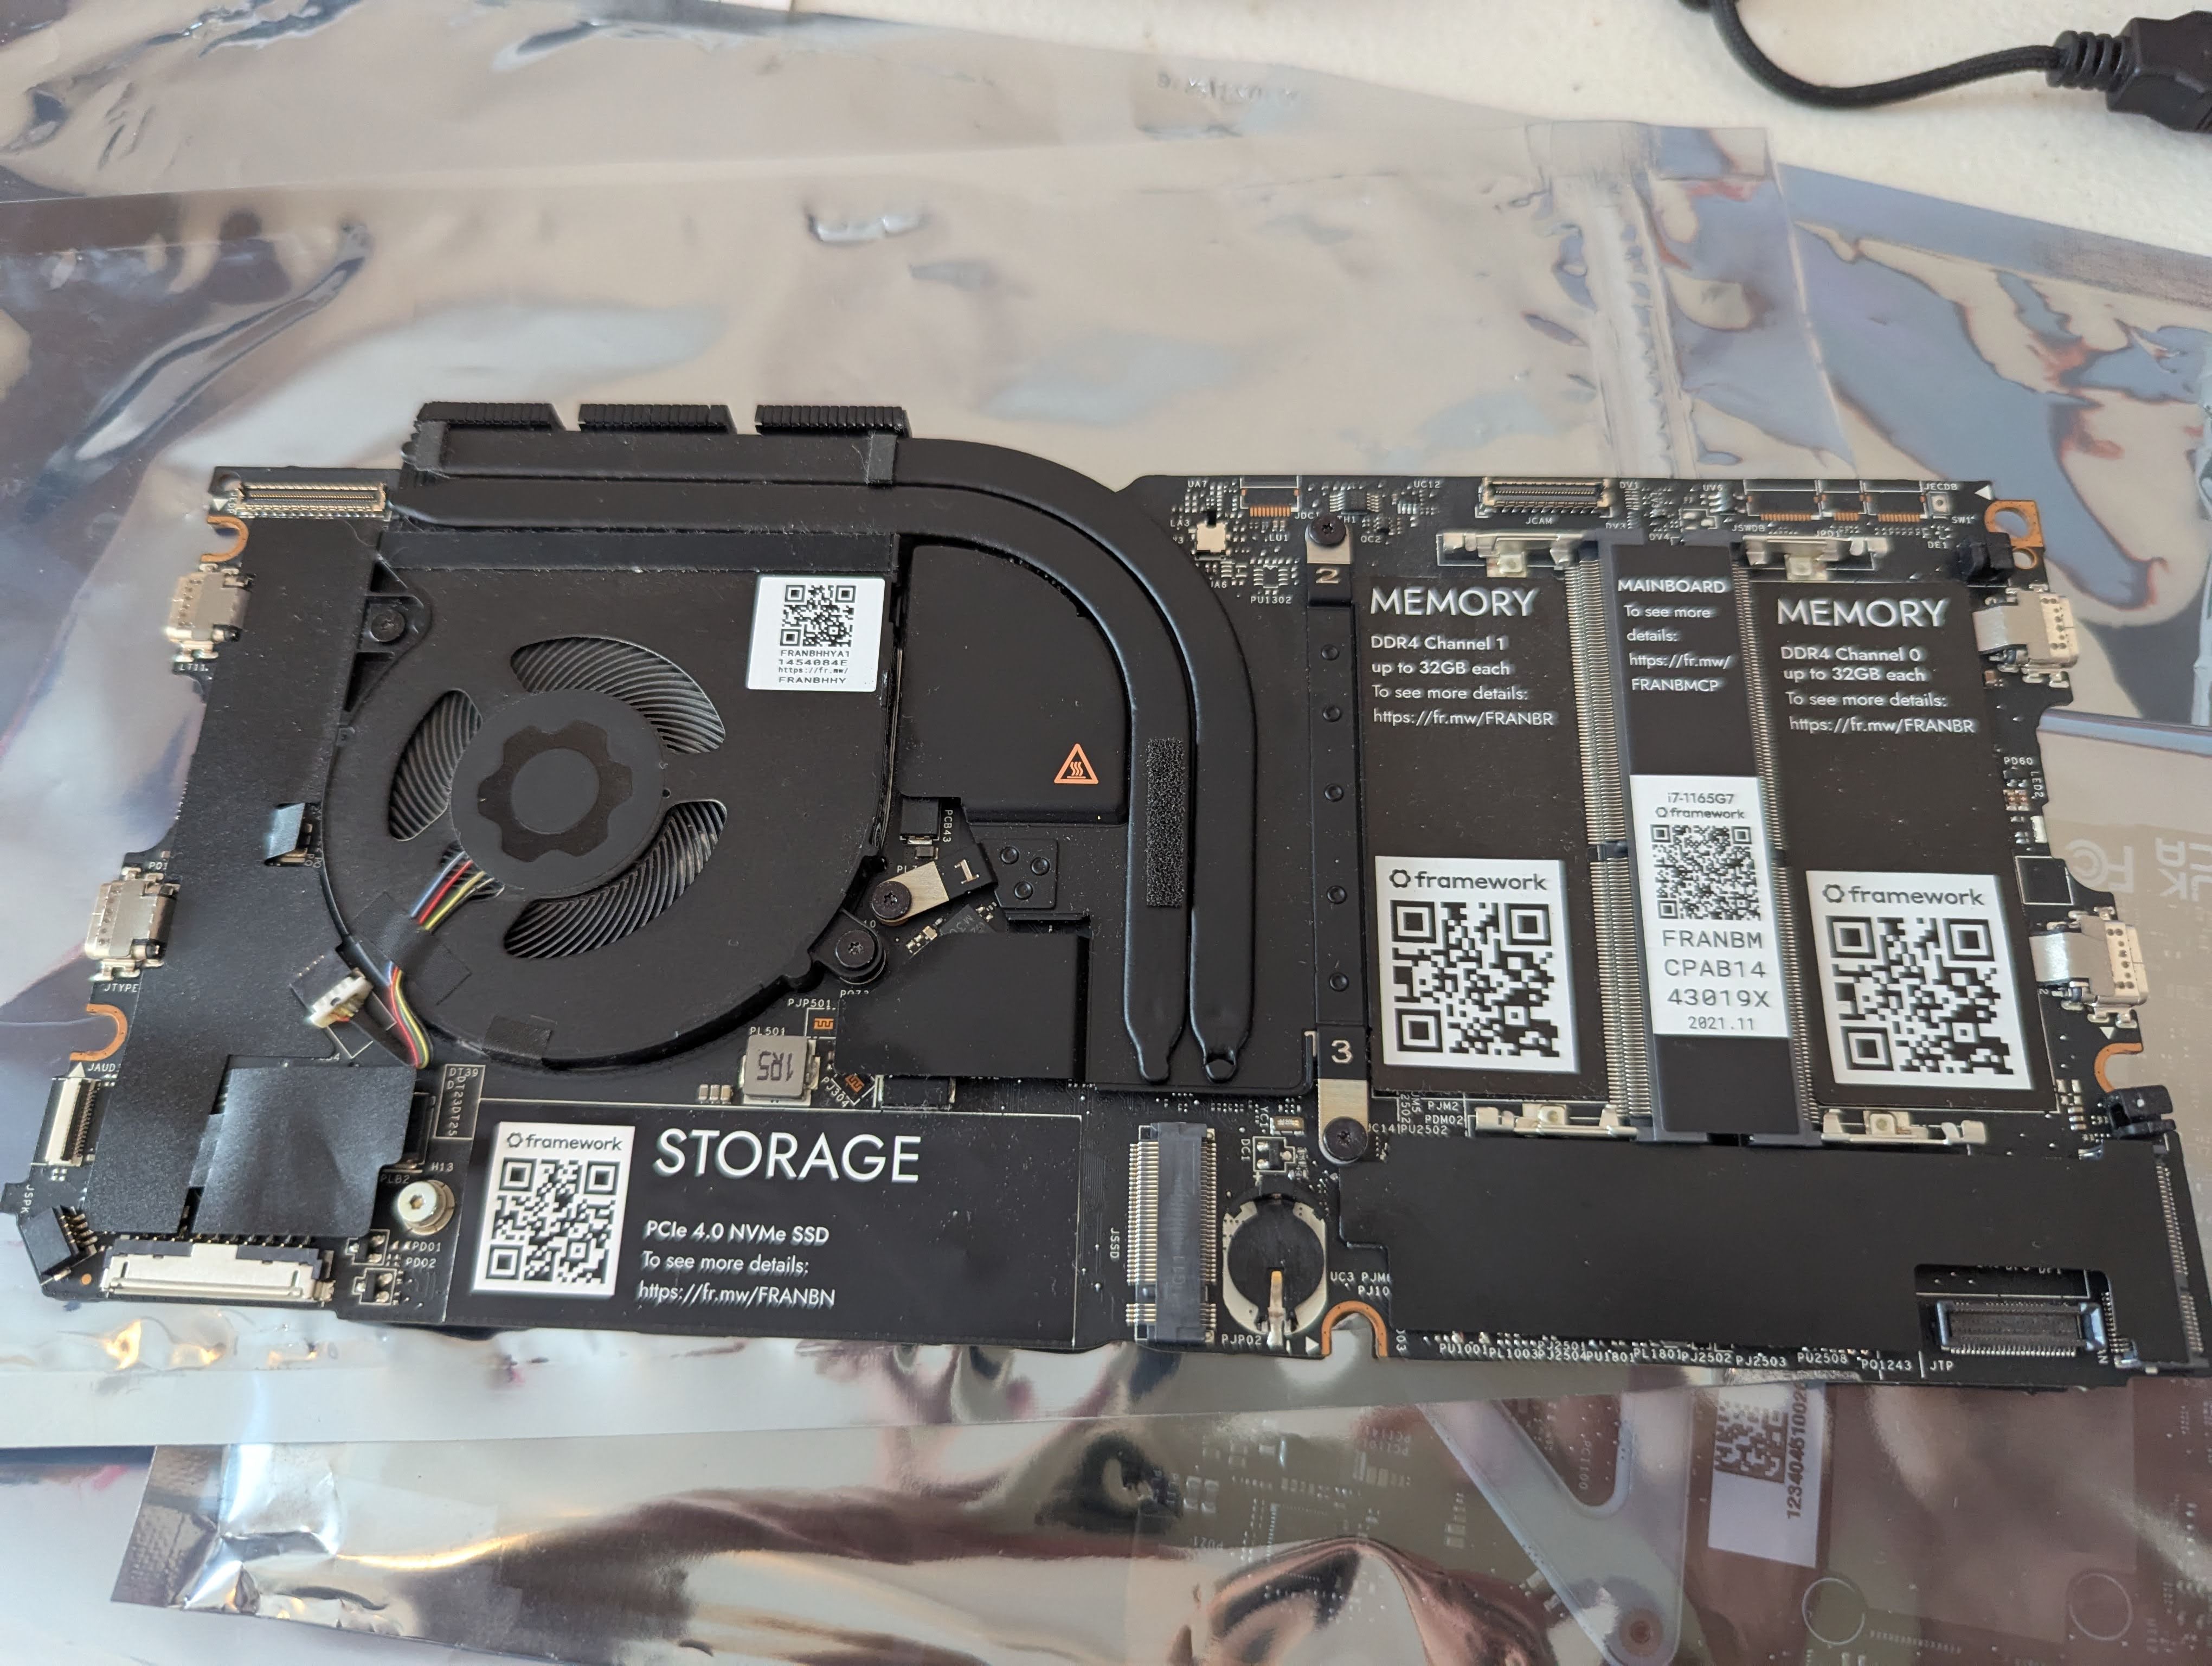
Looking over these parts are more damaged than my first batch. The main chassis has… “seen some shit” as they say. There is evidence of the “magic smoke” having escaped whatever motherboard was originally in it, and the blackend mark on the inside of the case bears witness to unspeakable horrors. The input covers are in decent condition, some funky bends in one but I gently but forcefully bent it back into shape and there appears to be no harm done. And the top cover includes the webcam module! nice.
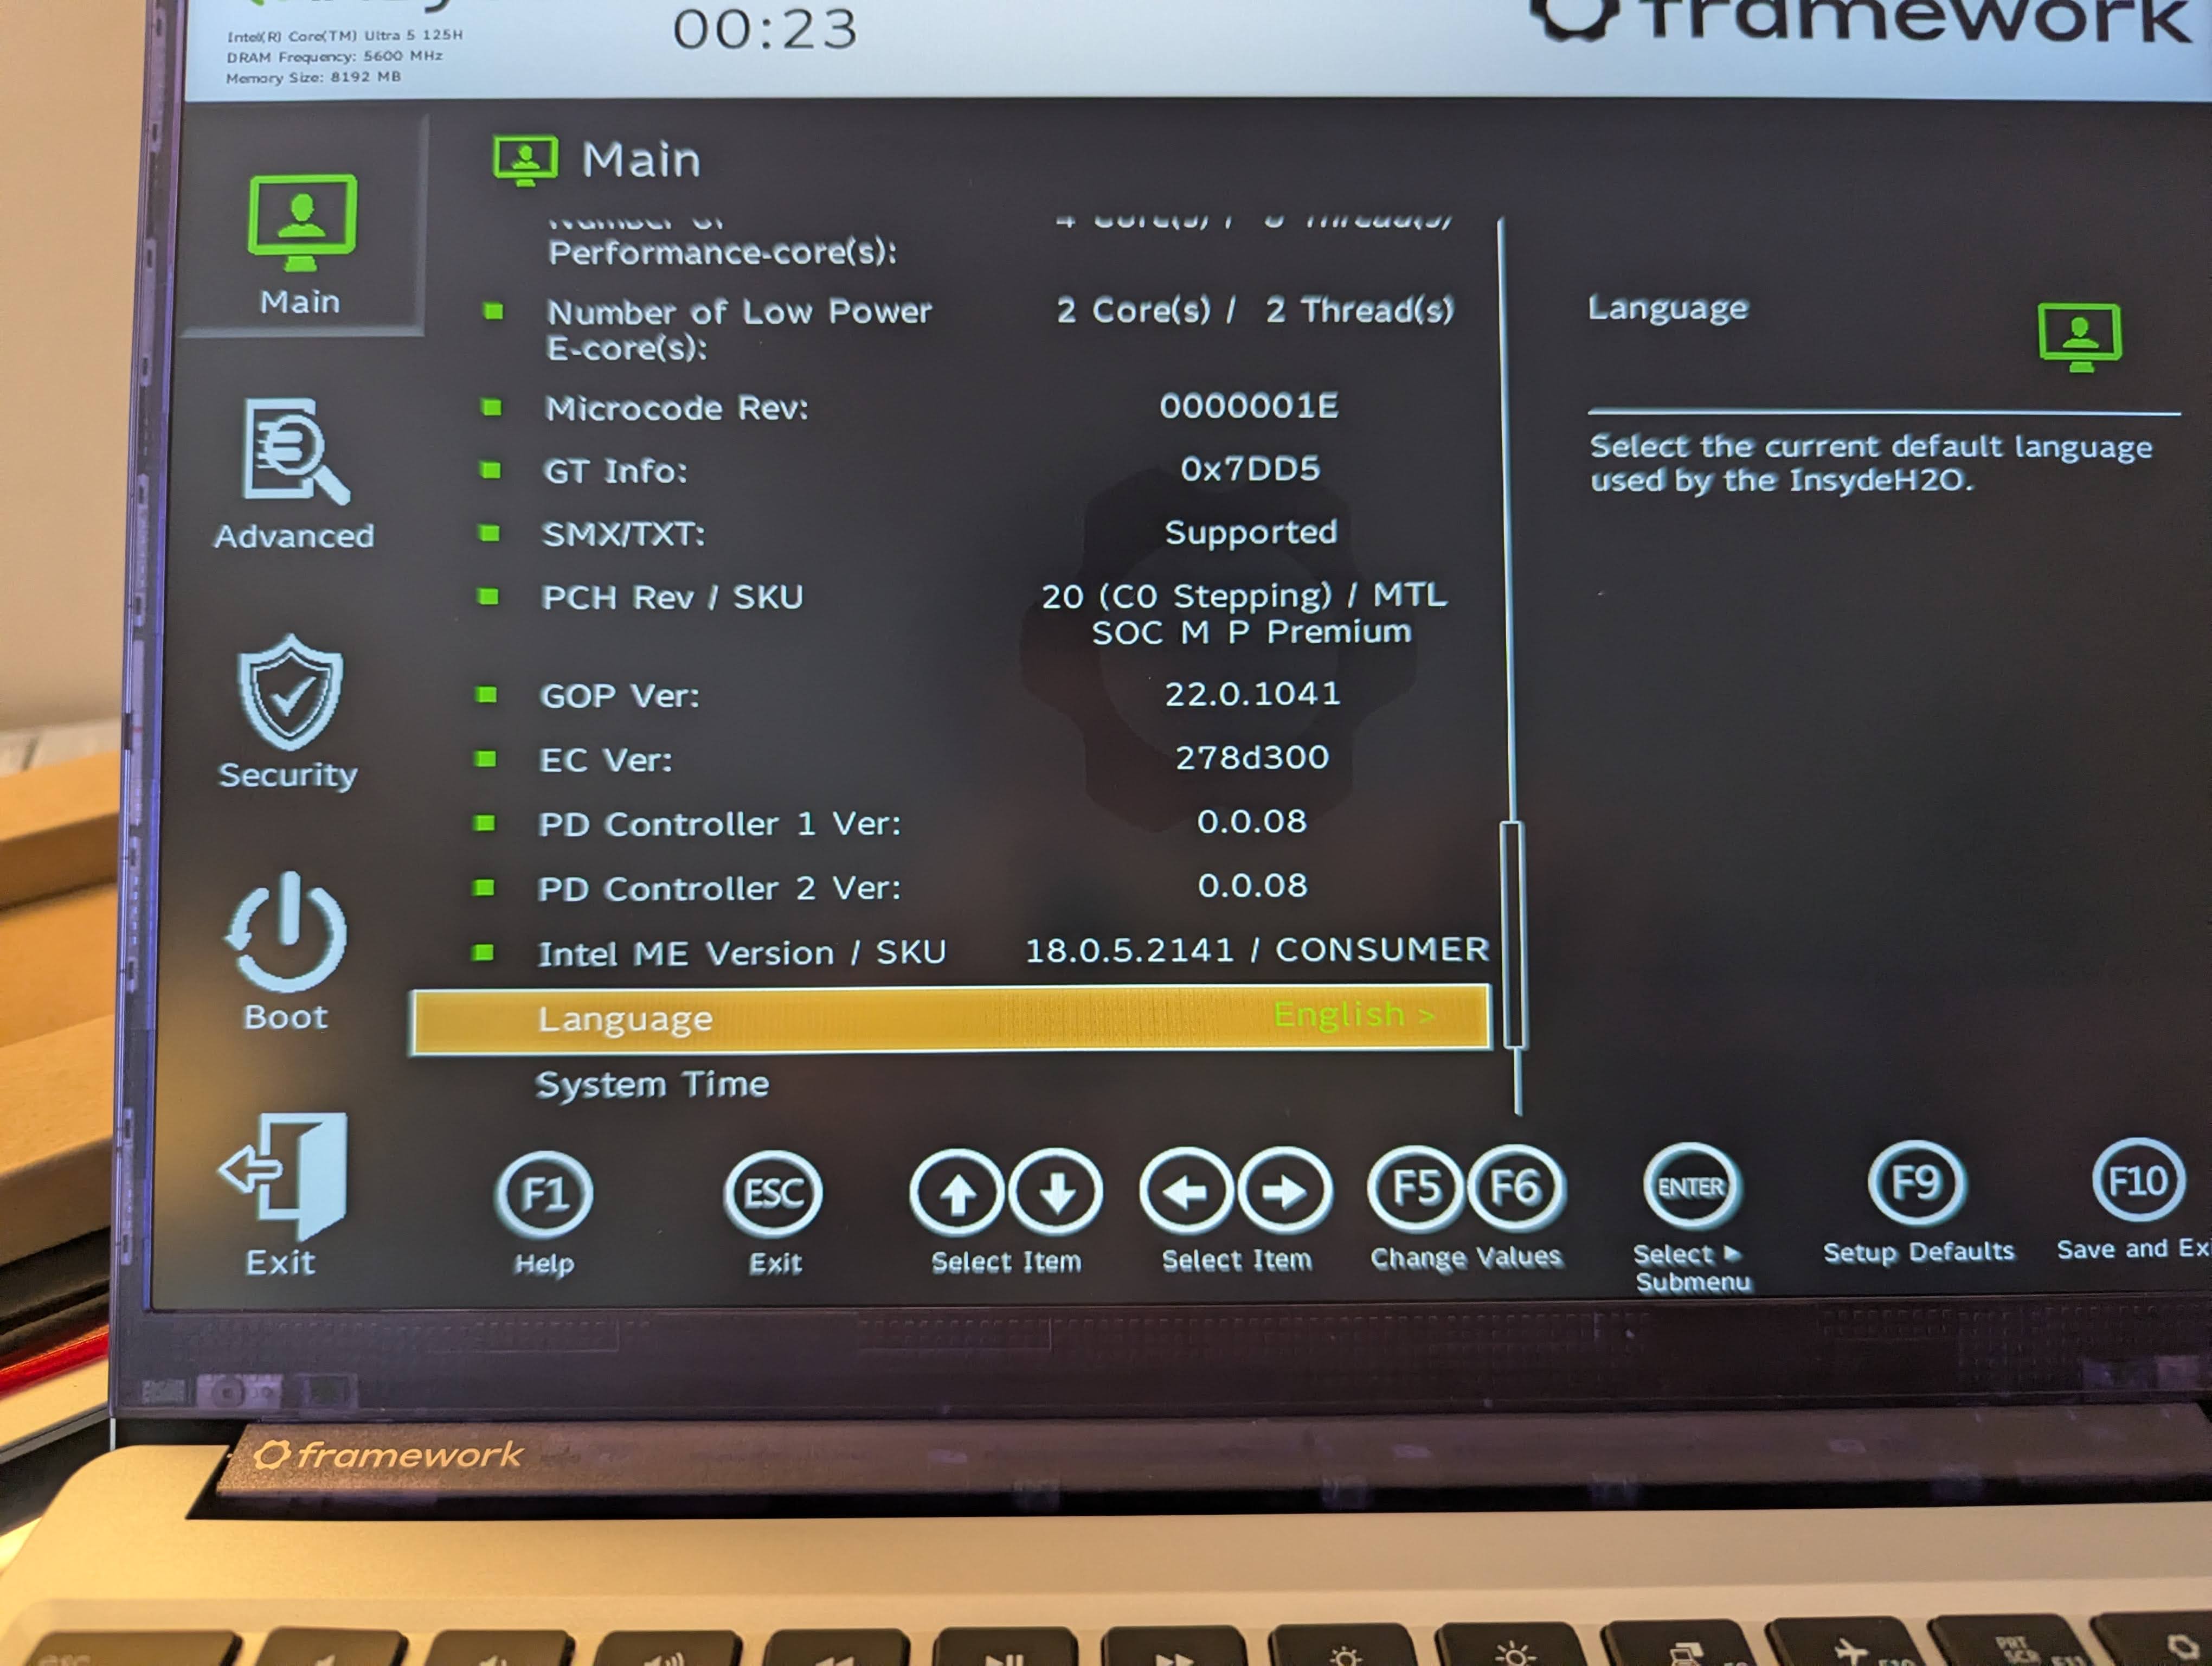
There are two motherboards, an older 11th gen intel motherboard, and a newer Core Ultra Series 1. The 11th gen motherboard looks fine. Its missing its cmos battery but other than that no obvious issues.
The Core 1 on the other hand… has seen better days.
Corrosion and Schematic review#
This one has a bad case of corrosion, I’m assuming due to liquid damage.
Thus begins the actual repair work. I use some 99% Isopropyl alcohol and an anti-static plastic brush to clean the area. I followed this up by using soldering flux, new solder, and a soldering iron to further clean the pins and solder pads.
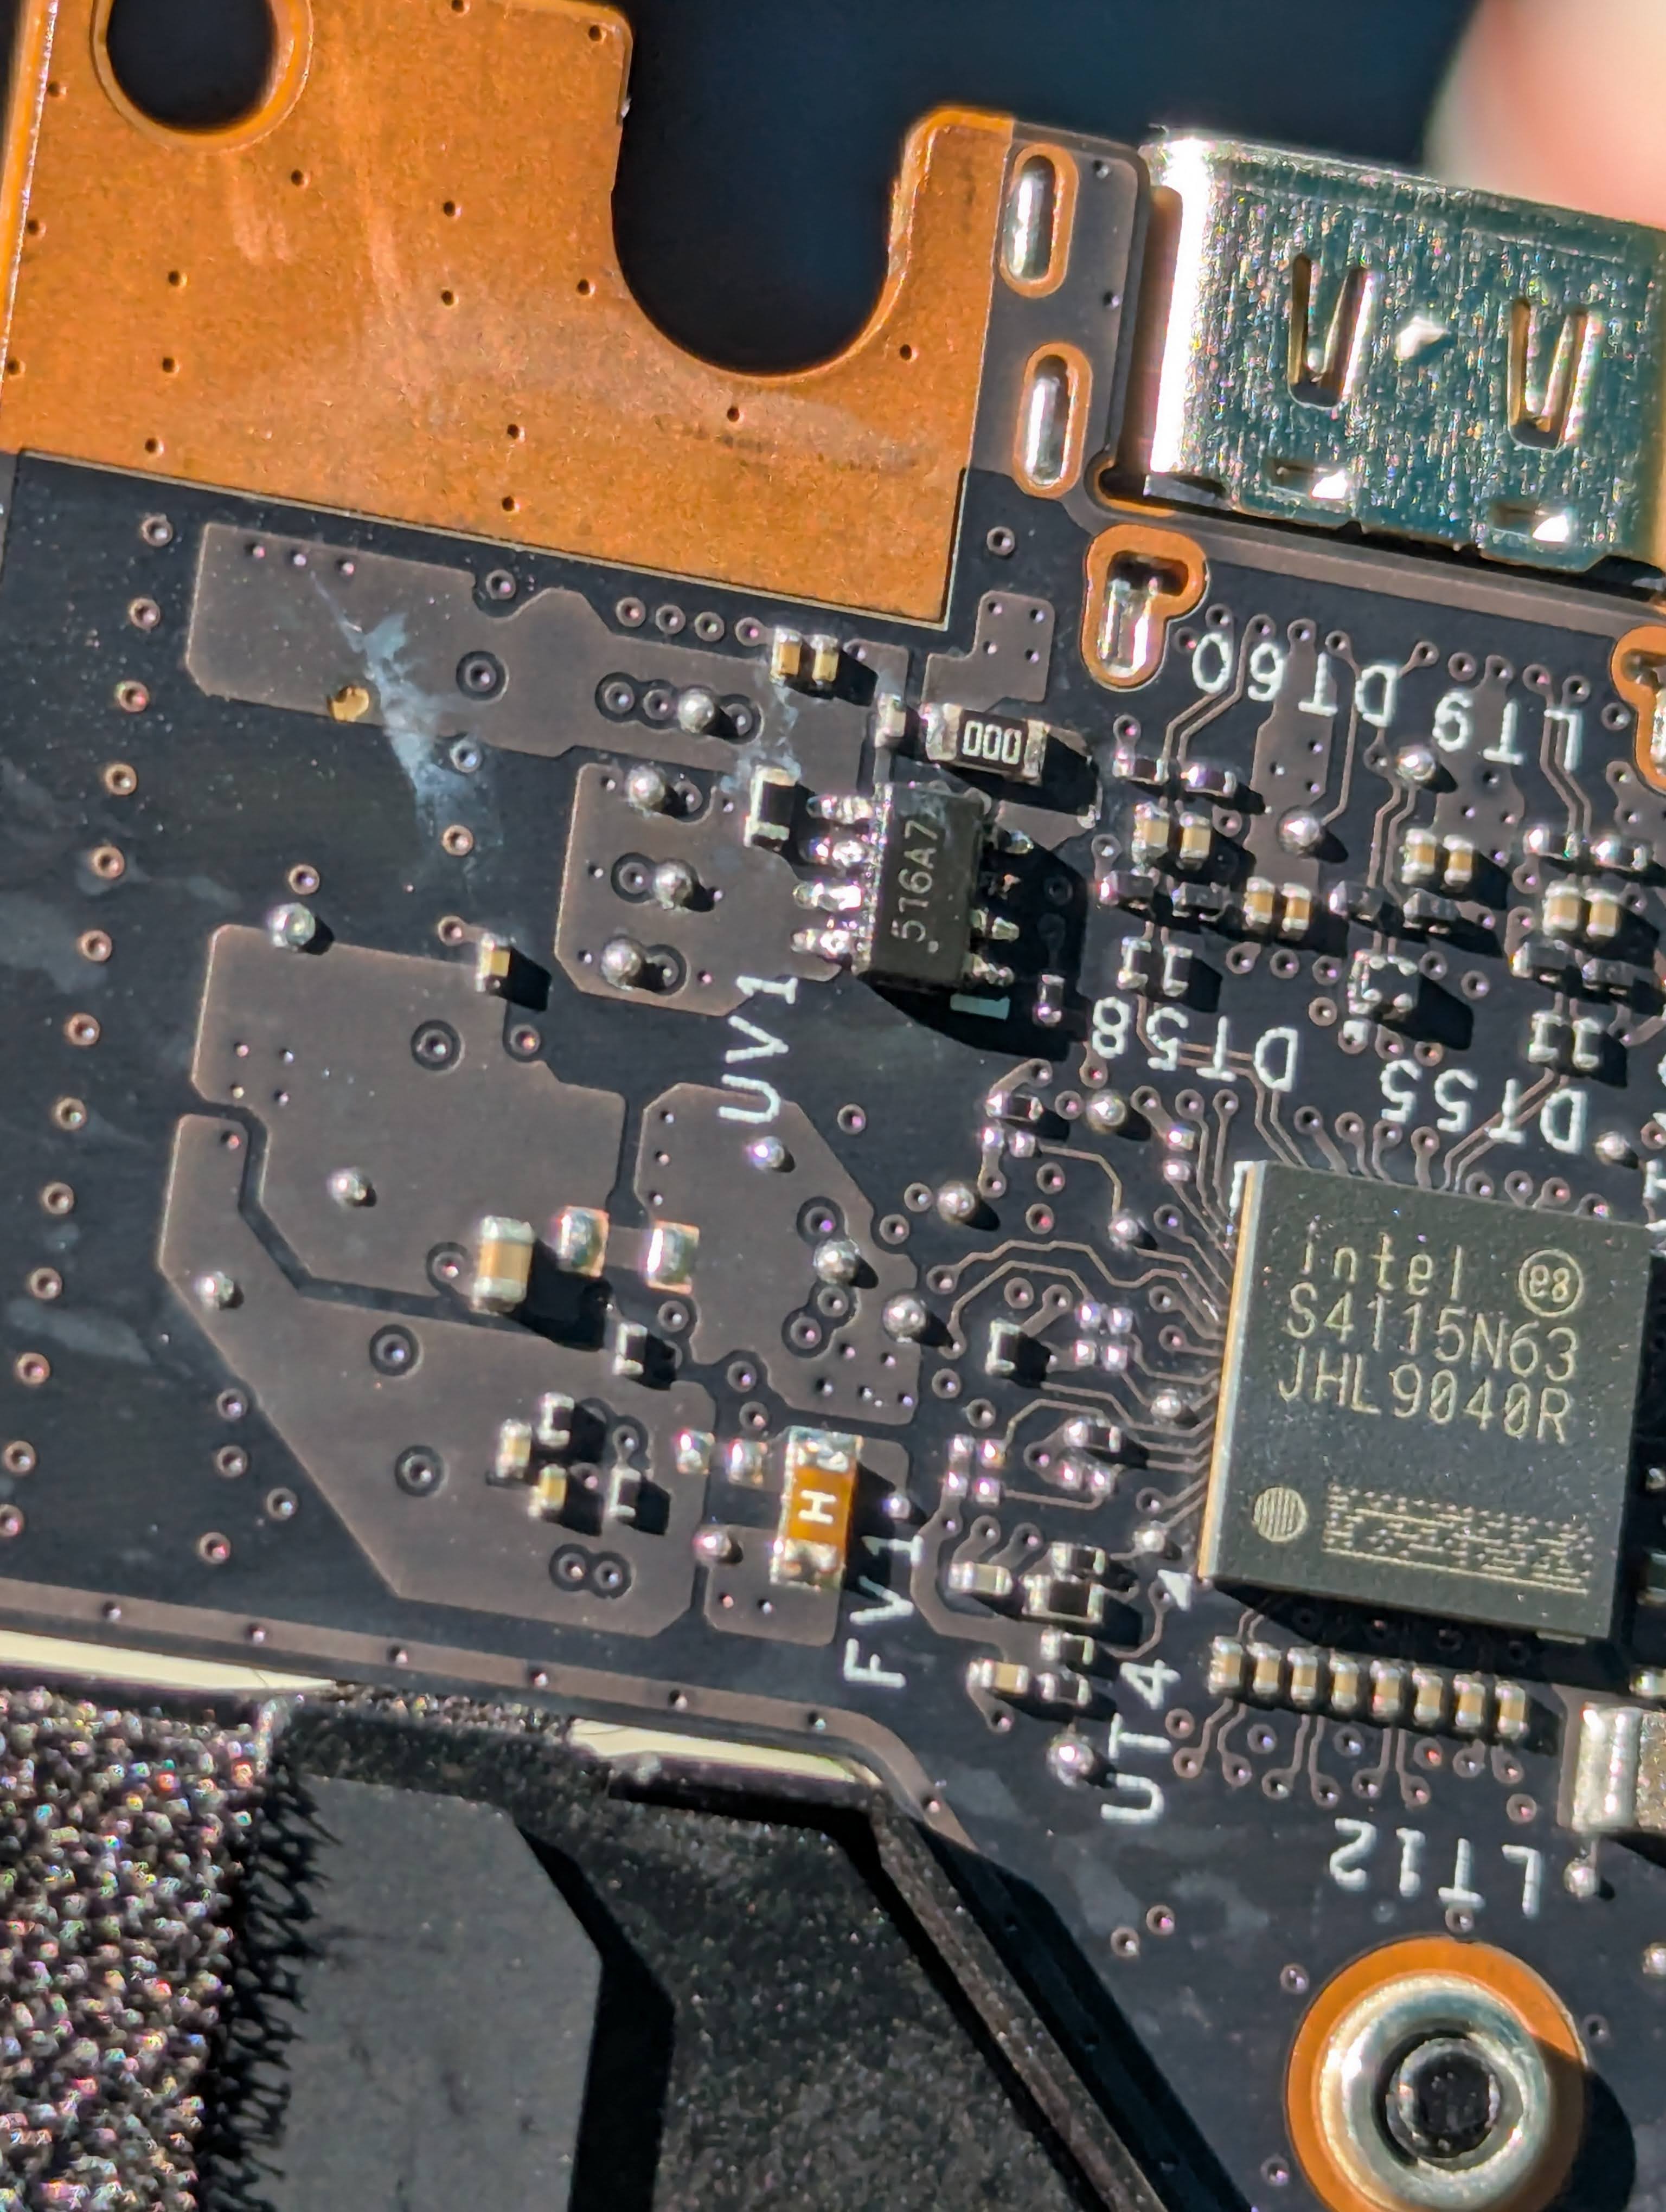
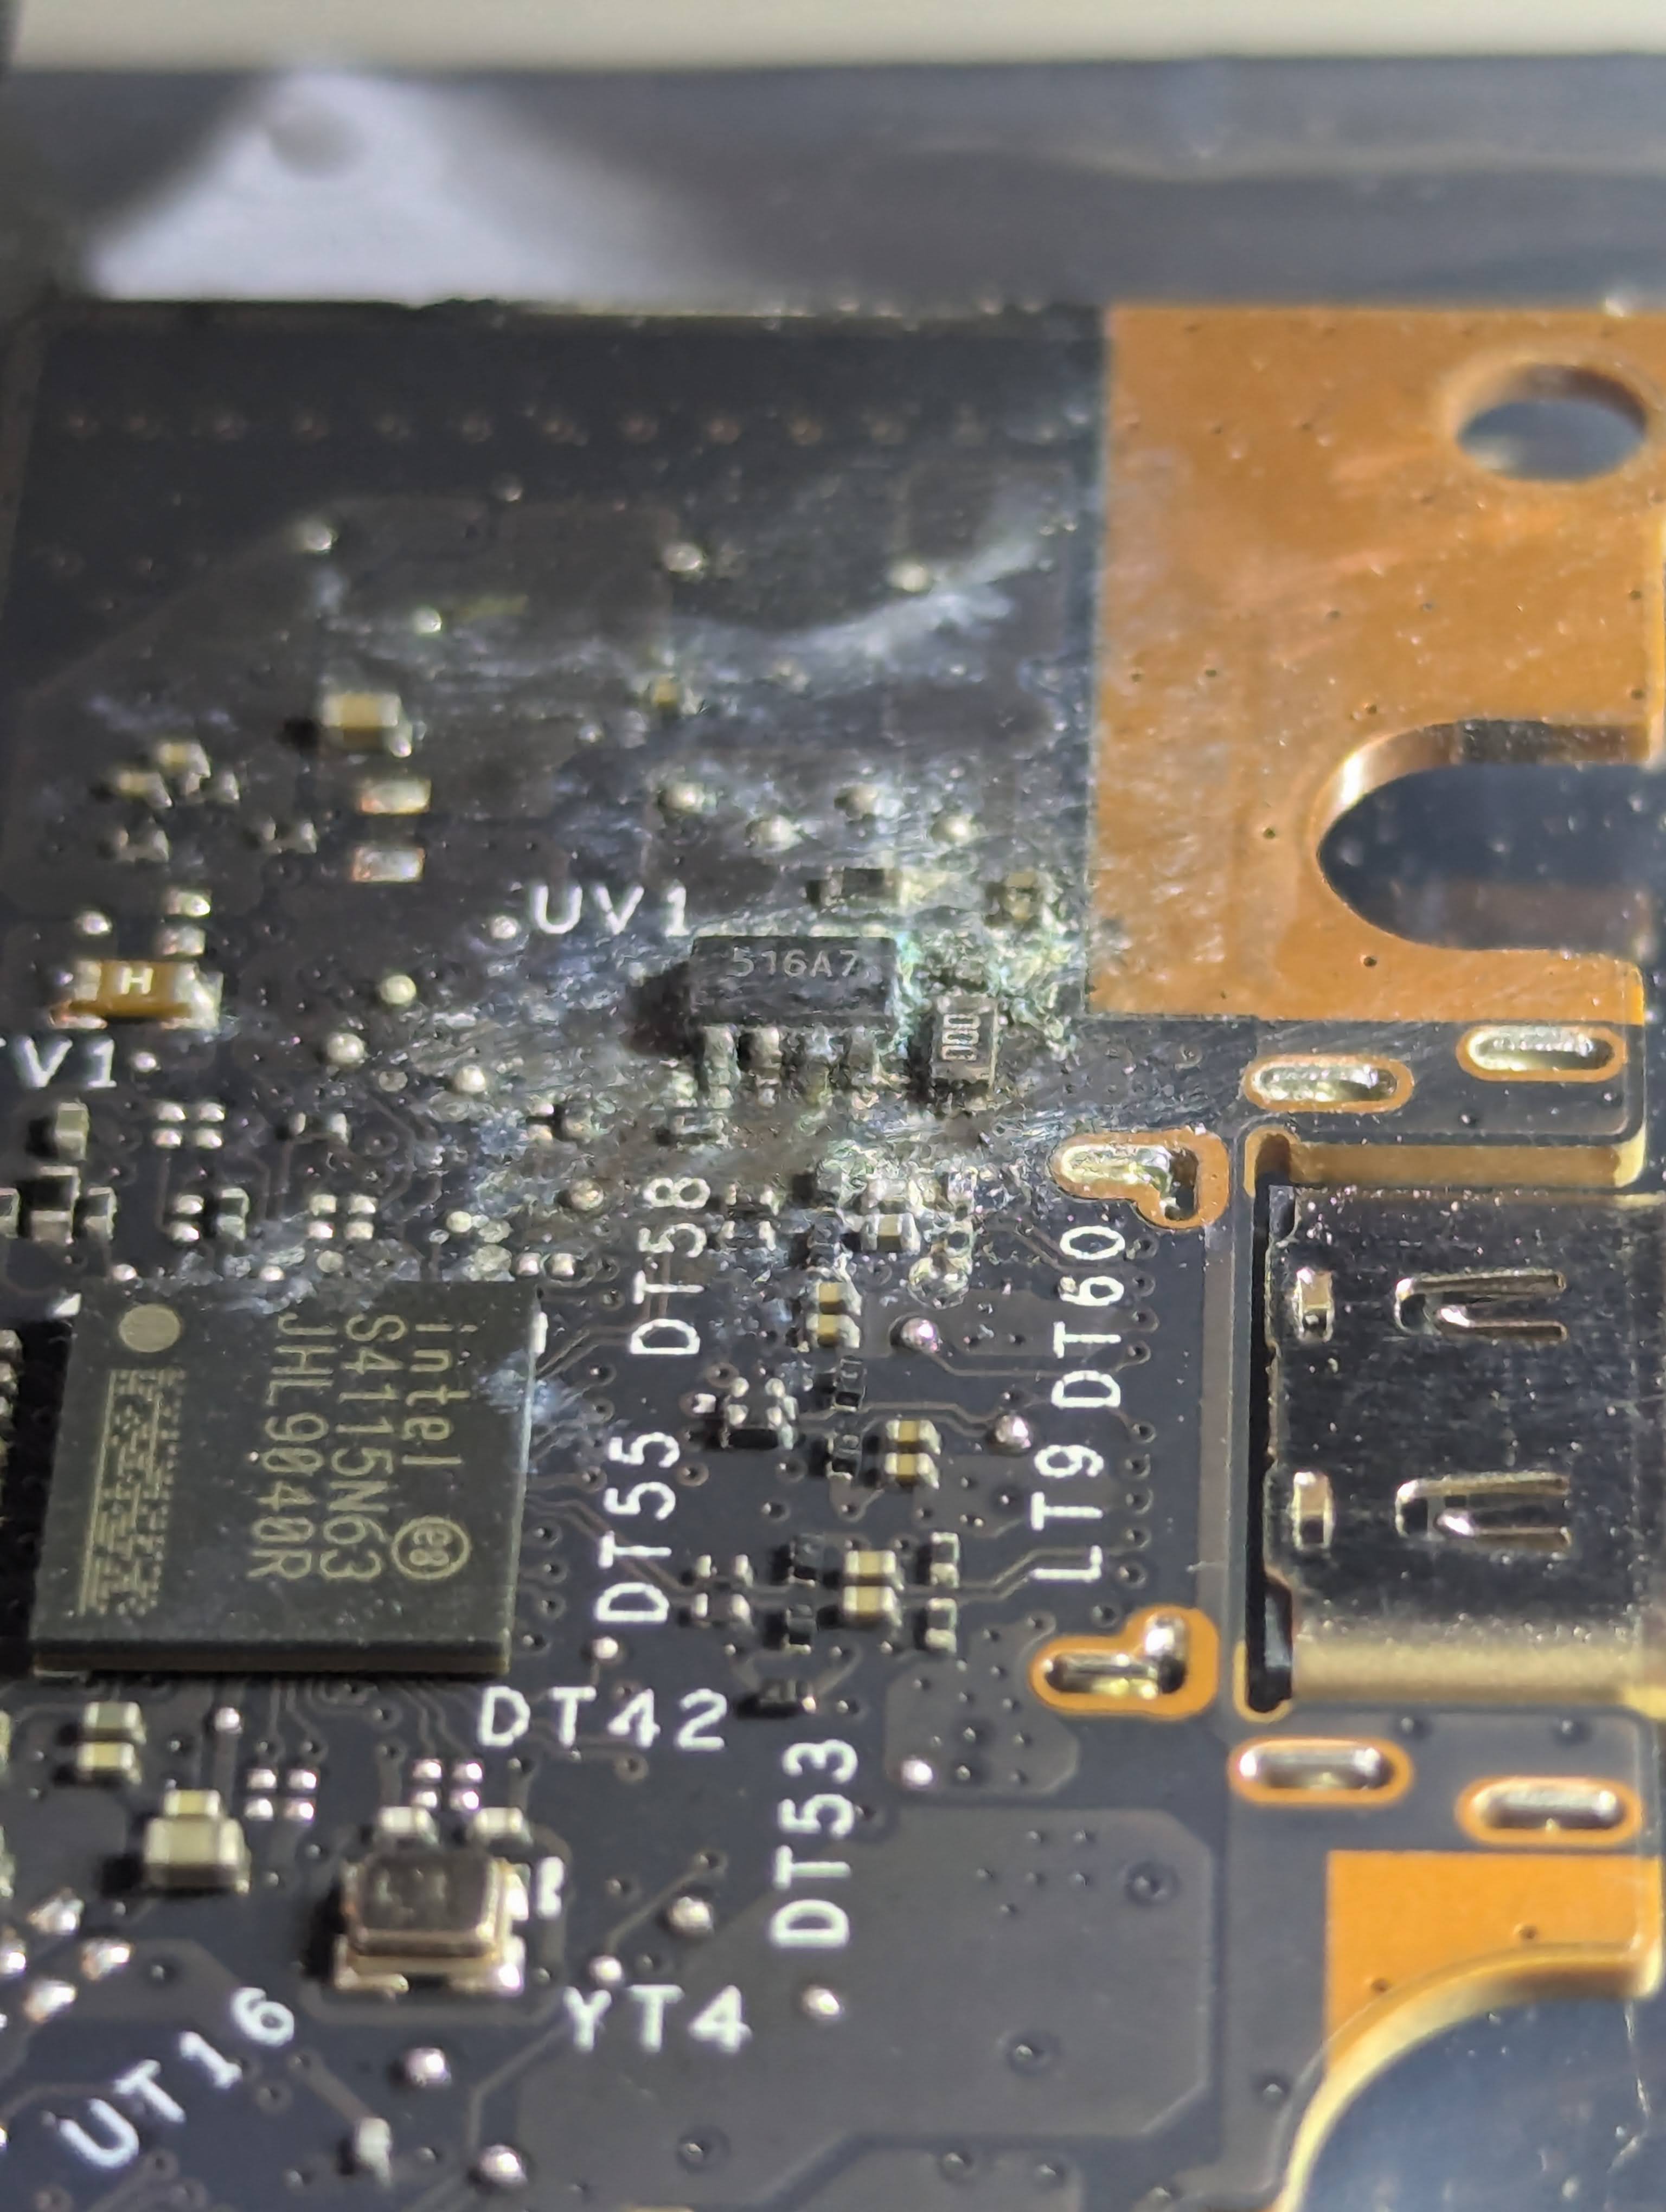
Taking a closer look at the chip I was able to google the numbers on it and eventually located this thread, Framework 13 Issue tracker #40, where the chip is discussed. Having a rough idea of what it does, provide power to the display, and what its pins do I was able to test and confirm functionality. Unfortunately, on closer inspection it is missing a pin! The corrosion, likely combined with my cleaning efforts, have disloged a pin on this chip.
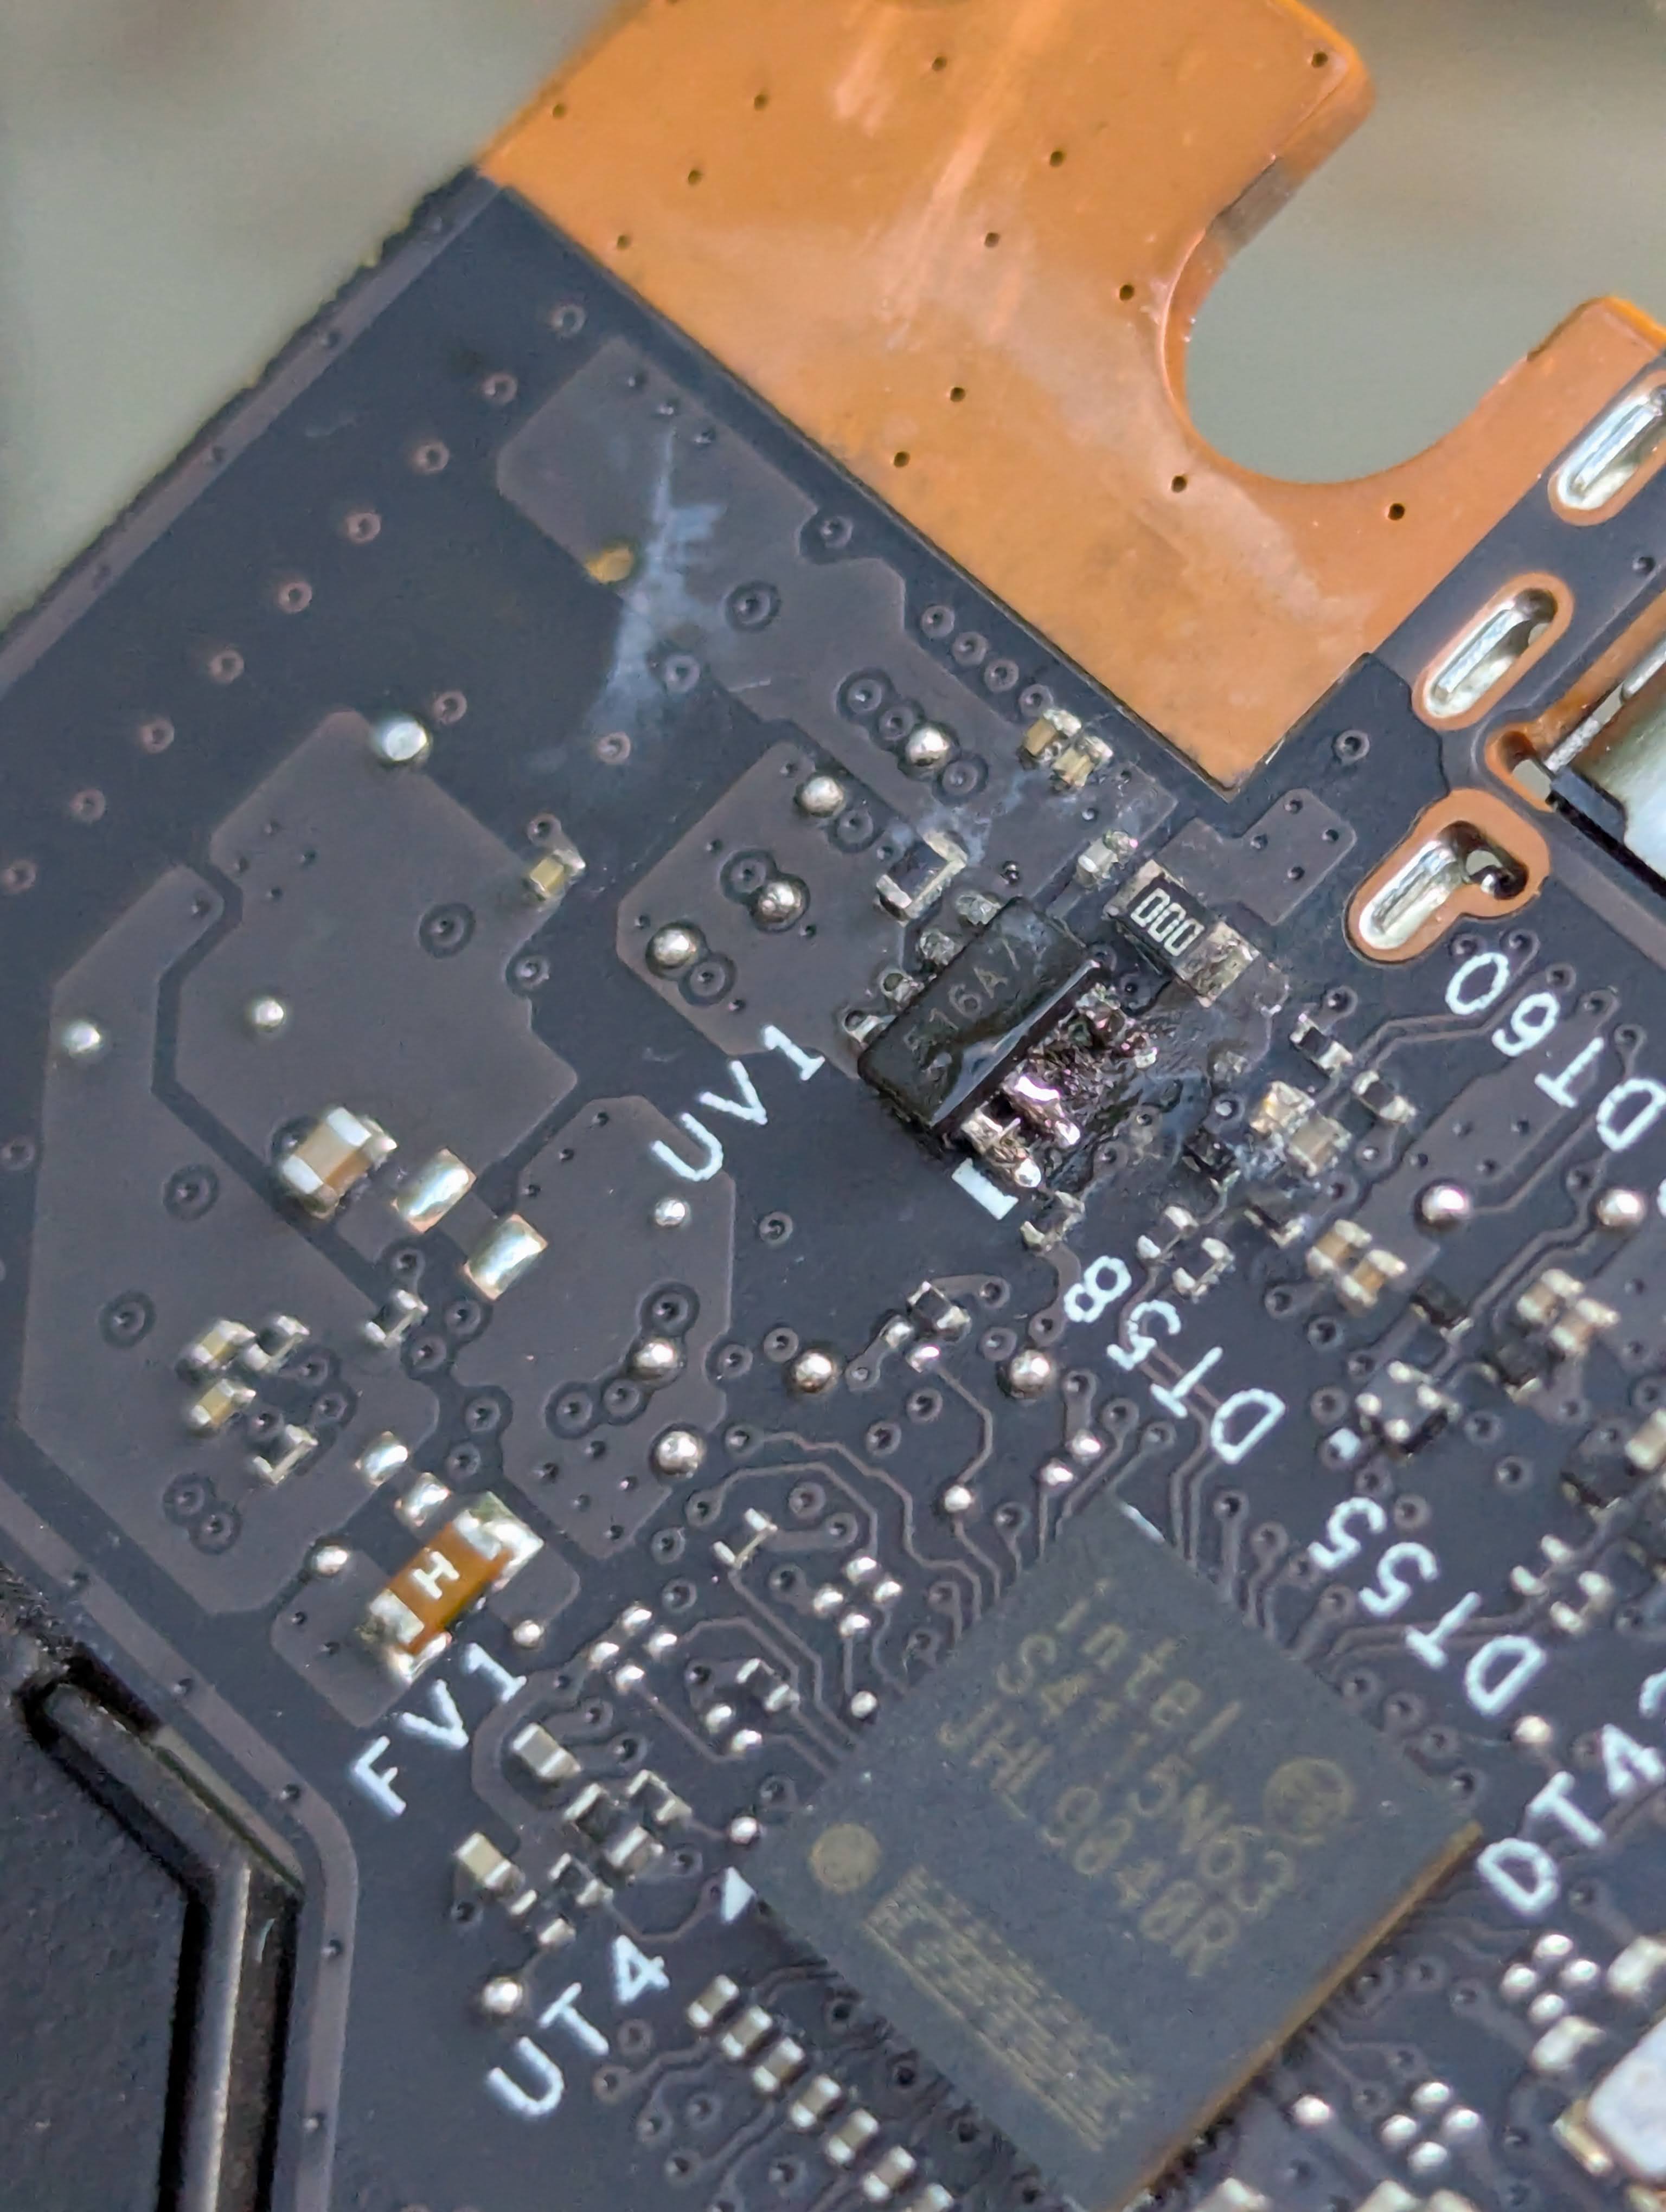
It is hard to see, even in real life, but the pictures make it even less obvious. Finally I was able to get enough light on it to get this picture which shows the damage pretty clearly. Note this image also shows some of my poor solder work, which I improved later.
After some research I found that the two pins affected are connected internally (and externally) and serve the same function, likely providing additional current pathways by having two pins. These are the pins that serve the 17.6v power rail for the display. It’s listed as backlight power only but the motherboard does not detect the display without it.
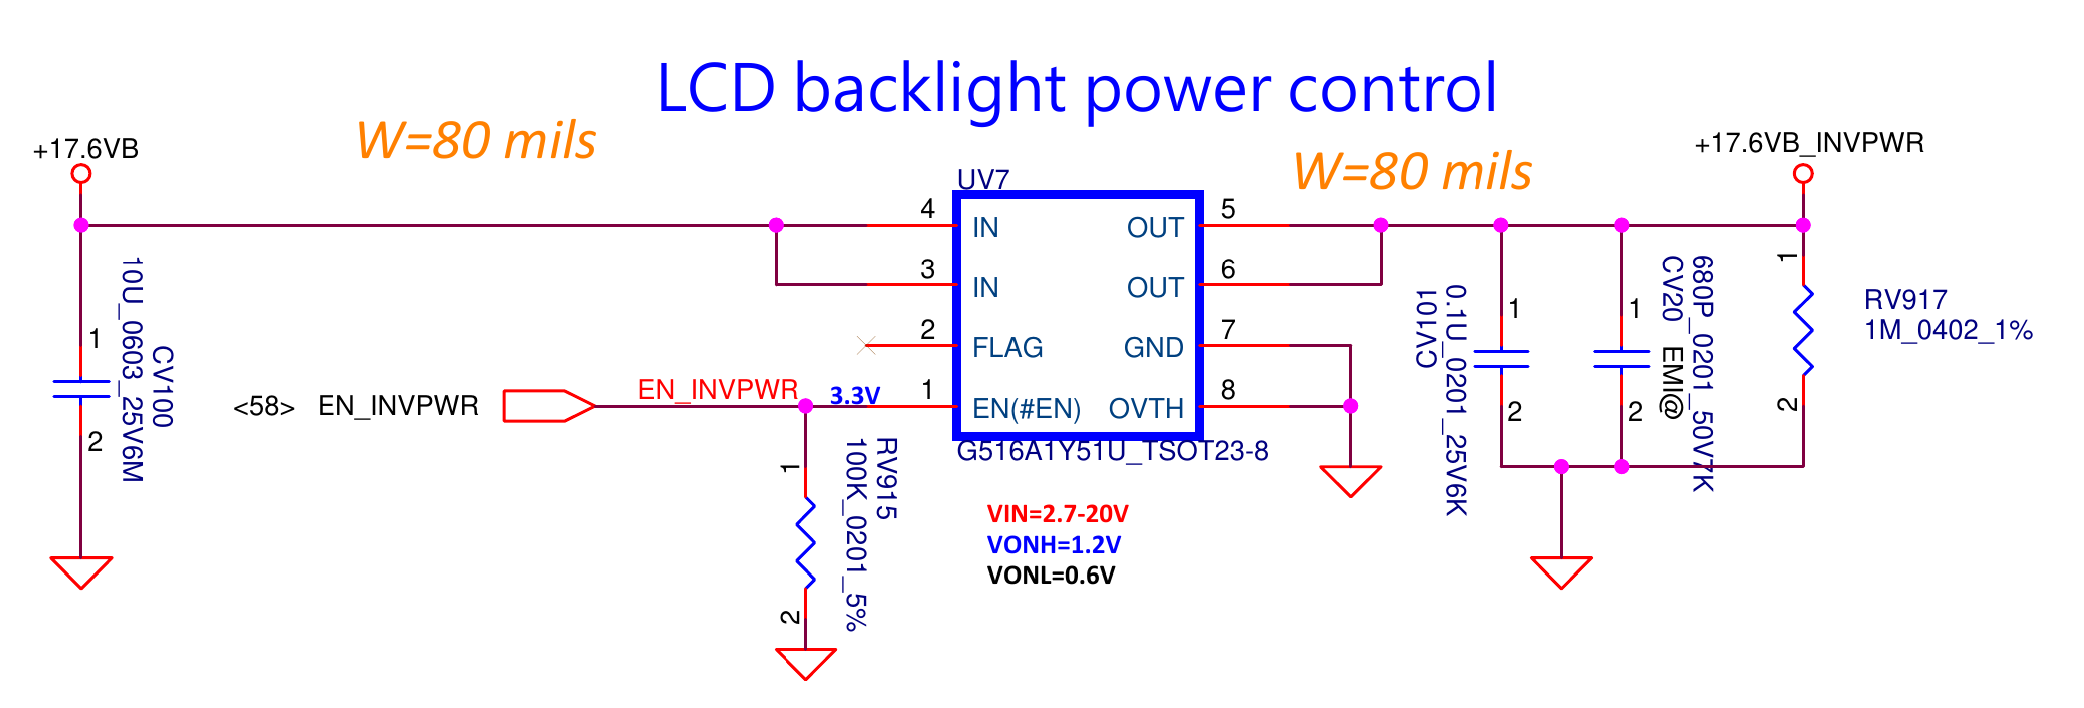
source: Framework helpfully provides block diagram schematics on their github
Further poking around with my multimeter I attempted to trace the power to this chip and from it to see if there was anything else wrong in the area, and I found that the adjacent 0ohm resistor not shown in the schematic was not allowing power to pass. It’s blown too.
I am making the assumption that this blew due to the corrosion and general mistreatment by the prior owner.
Repair#
I attempted to find a replacement for the chip but had no luck, as others have also attempted and posted about. There are some simular chips on aliexpress and elsewhere but nothing that gave me great confidence.
After confirming with my multimeter that the chip does deliver the required voltage at the 1 remaining pin, I decided to bypass the 0 ohm resistor. I had tried to remove it to replace it but it proved difficult, possibly due to the low heat output of my soldering iron, or as my uncle always says a poor carpenter blames his tools. A reflow station would be overkill but would definitely help.
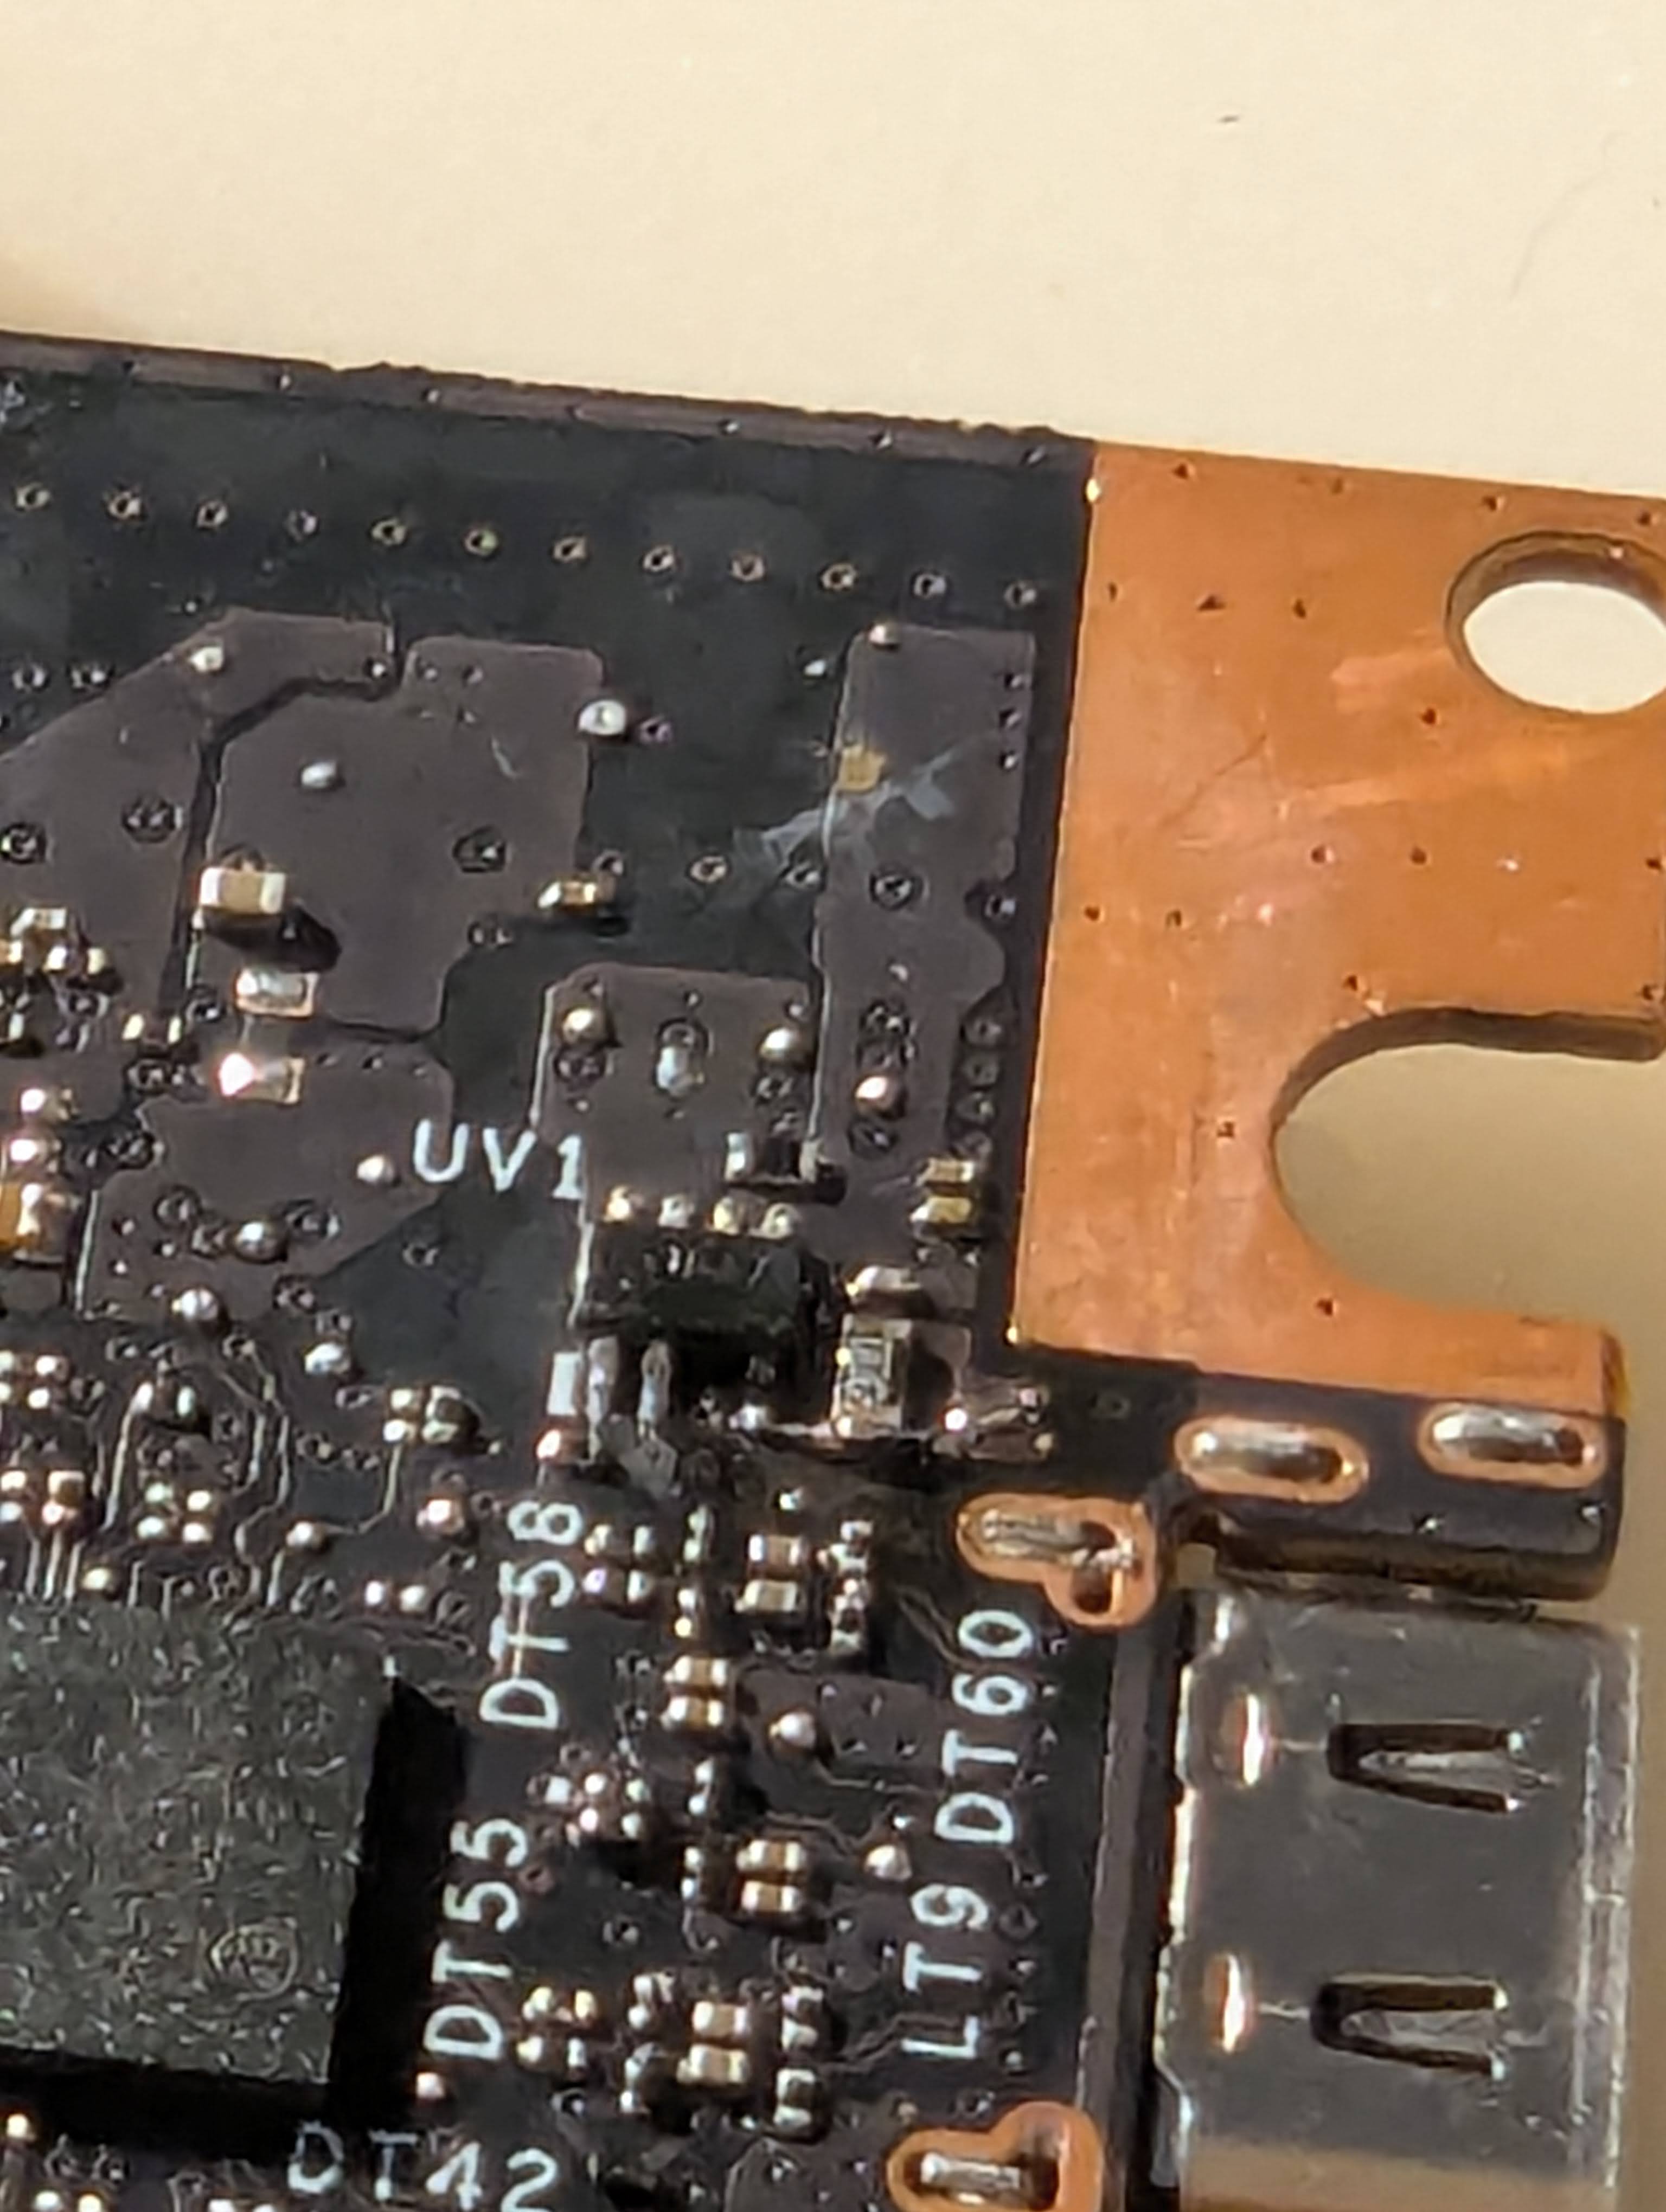
I initially tried to bypass the resistor by soldering an appropriately sized wire (e.g. what I had on hand) but this proved to be too big and it was difficult to avoid bridging with other components nearby. Instead I removed that and scratched out some solder mask from the copper field where the power travels through the motherboard by 4 vias, and created a larger area to solder to, then used one of the copper wires from a solder wick to bridge the gap to the resistor and directly to the pins next to it.
My biggest concern is that this wire may be too small to sustainably provide the power needed for the screen, and may need to be replaced in the future.
Success!#
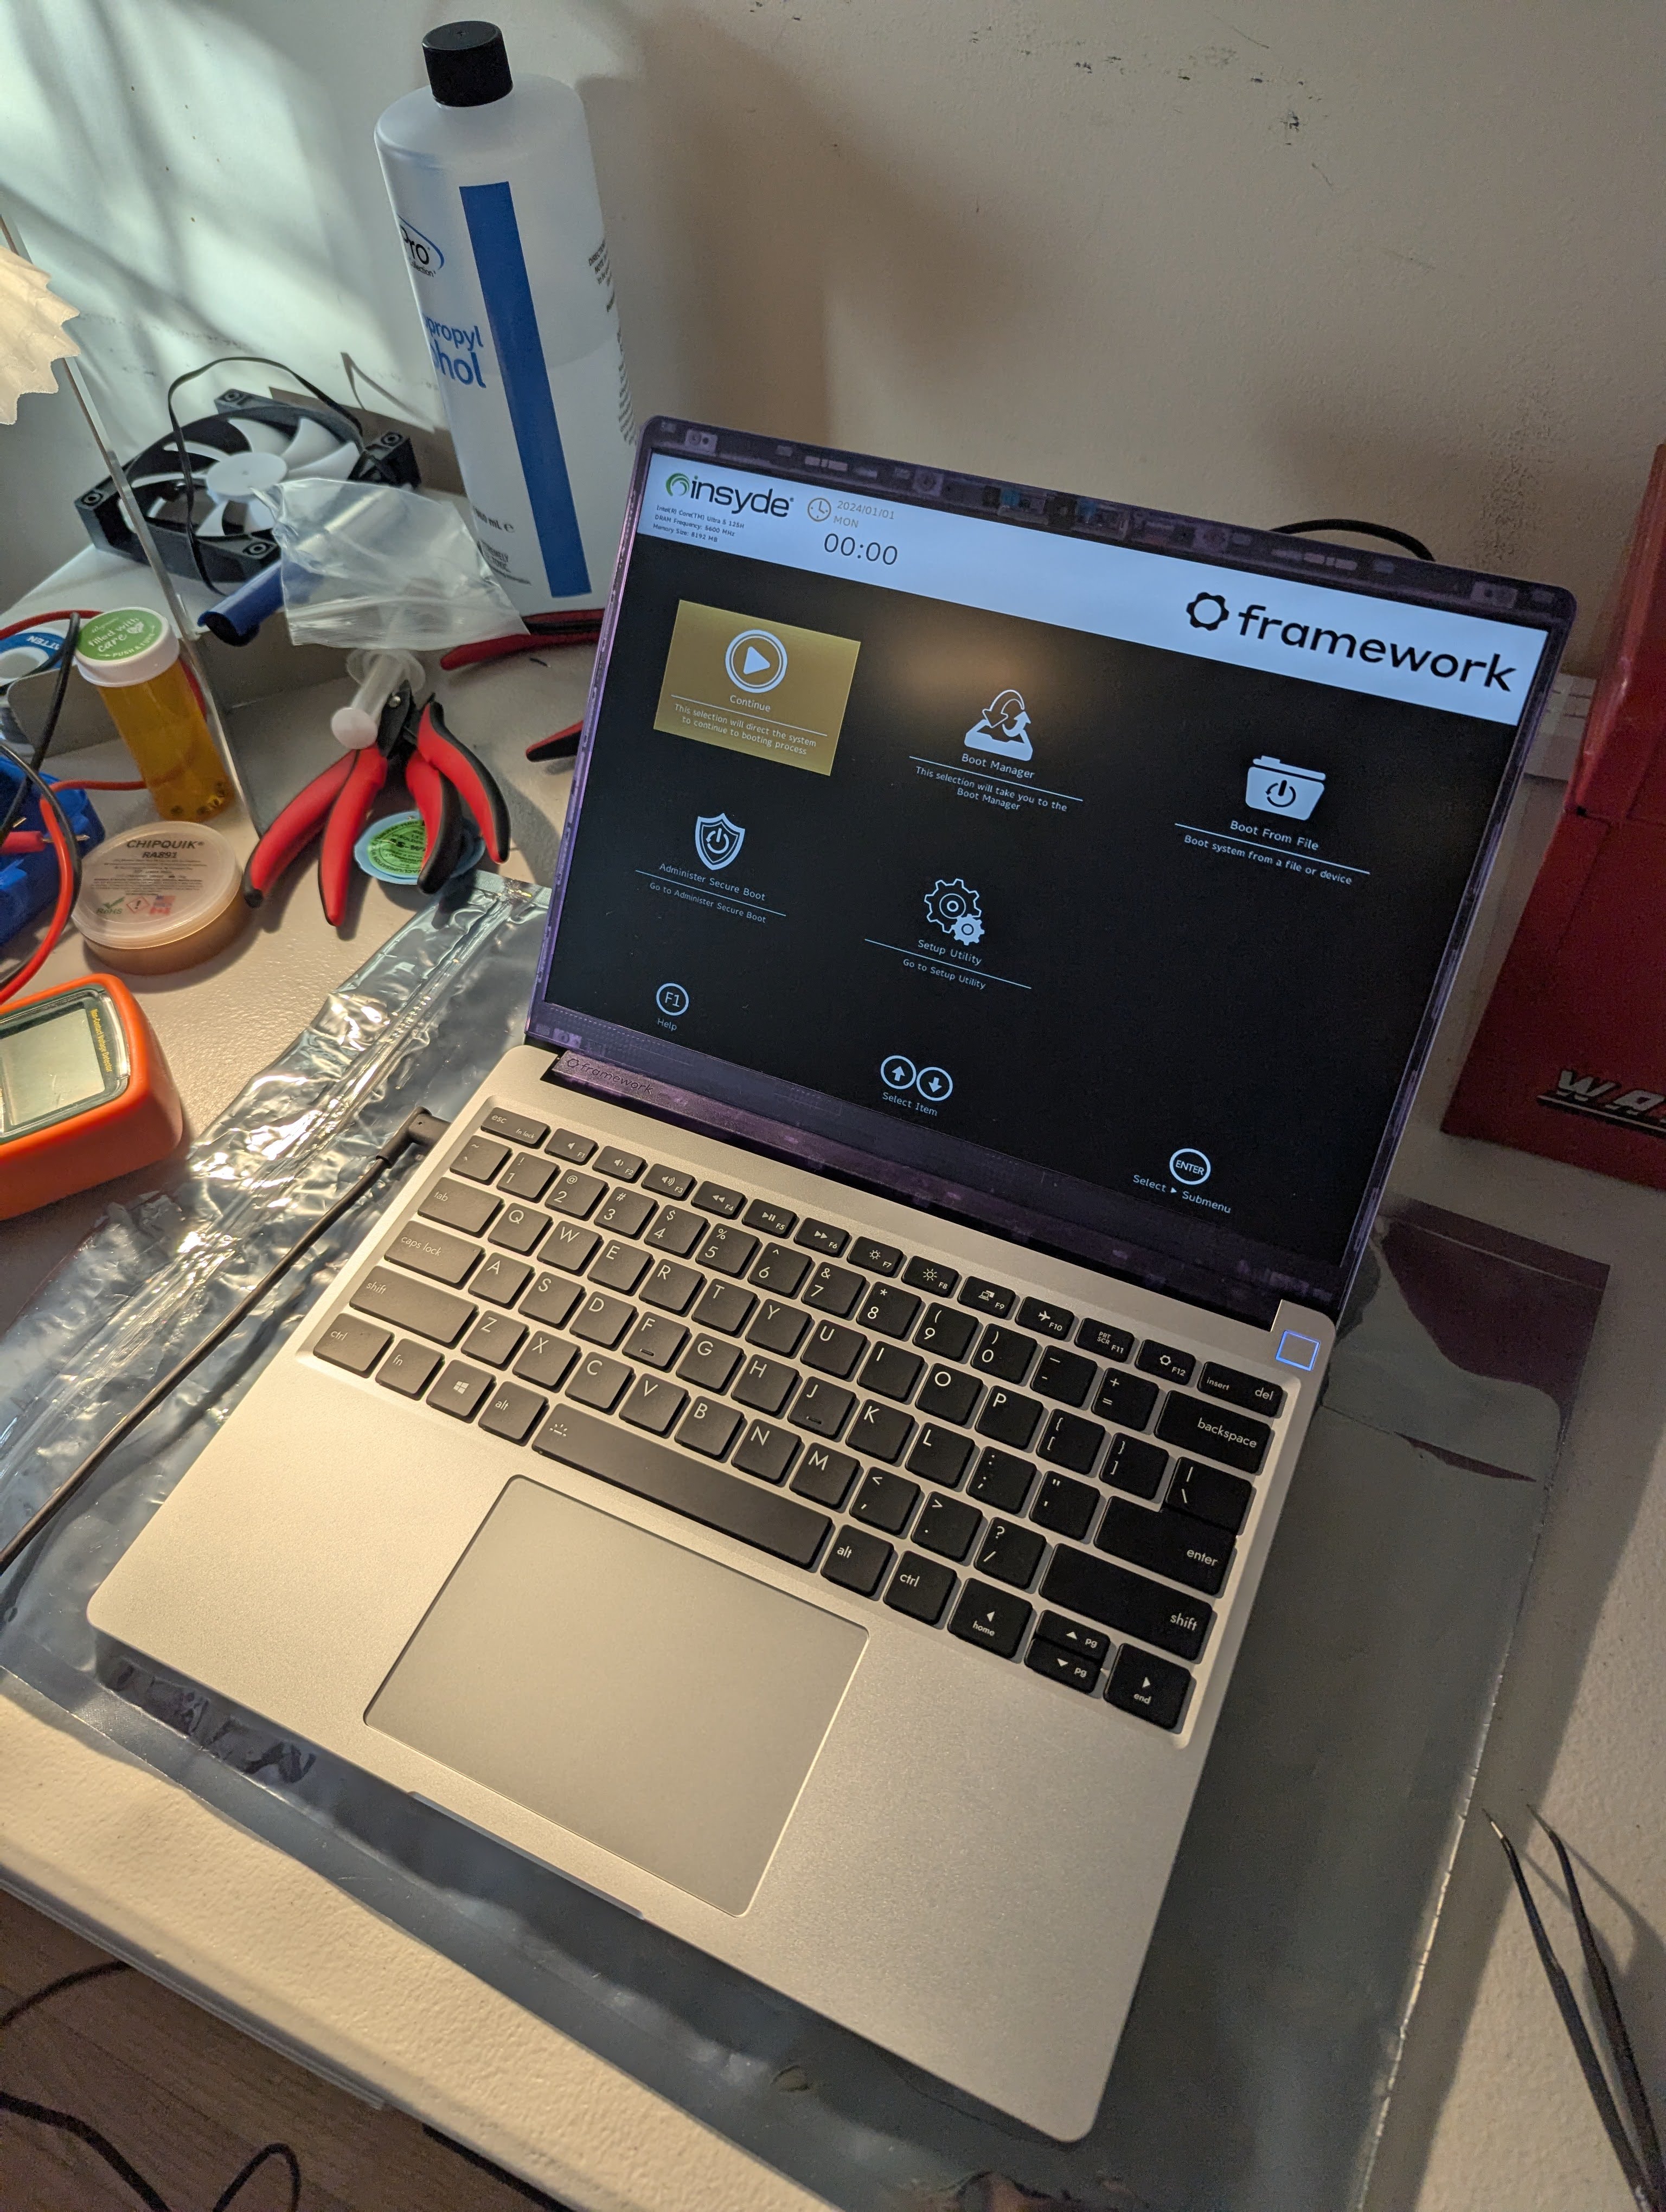
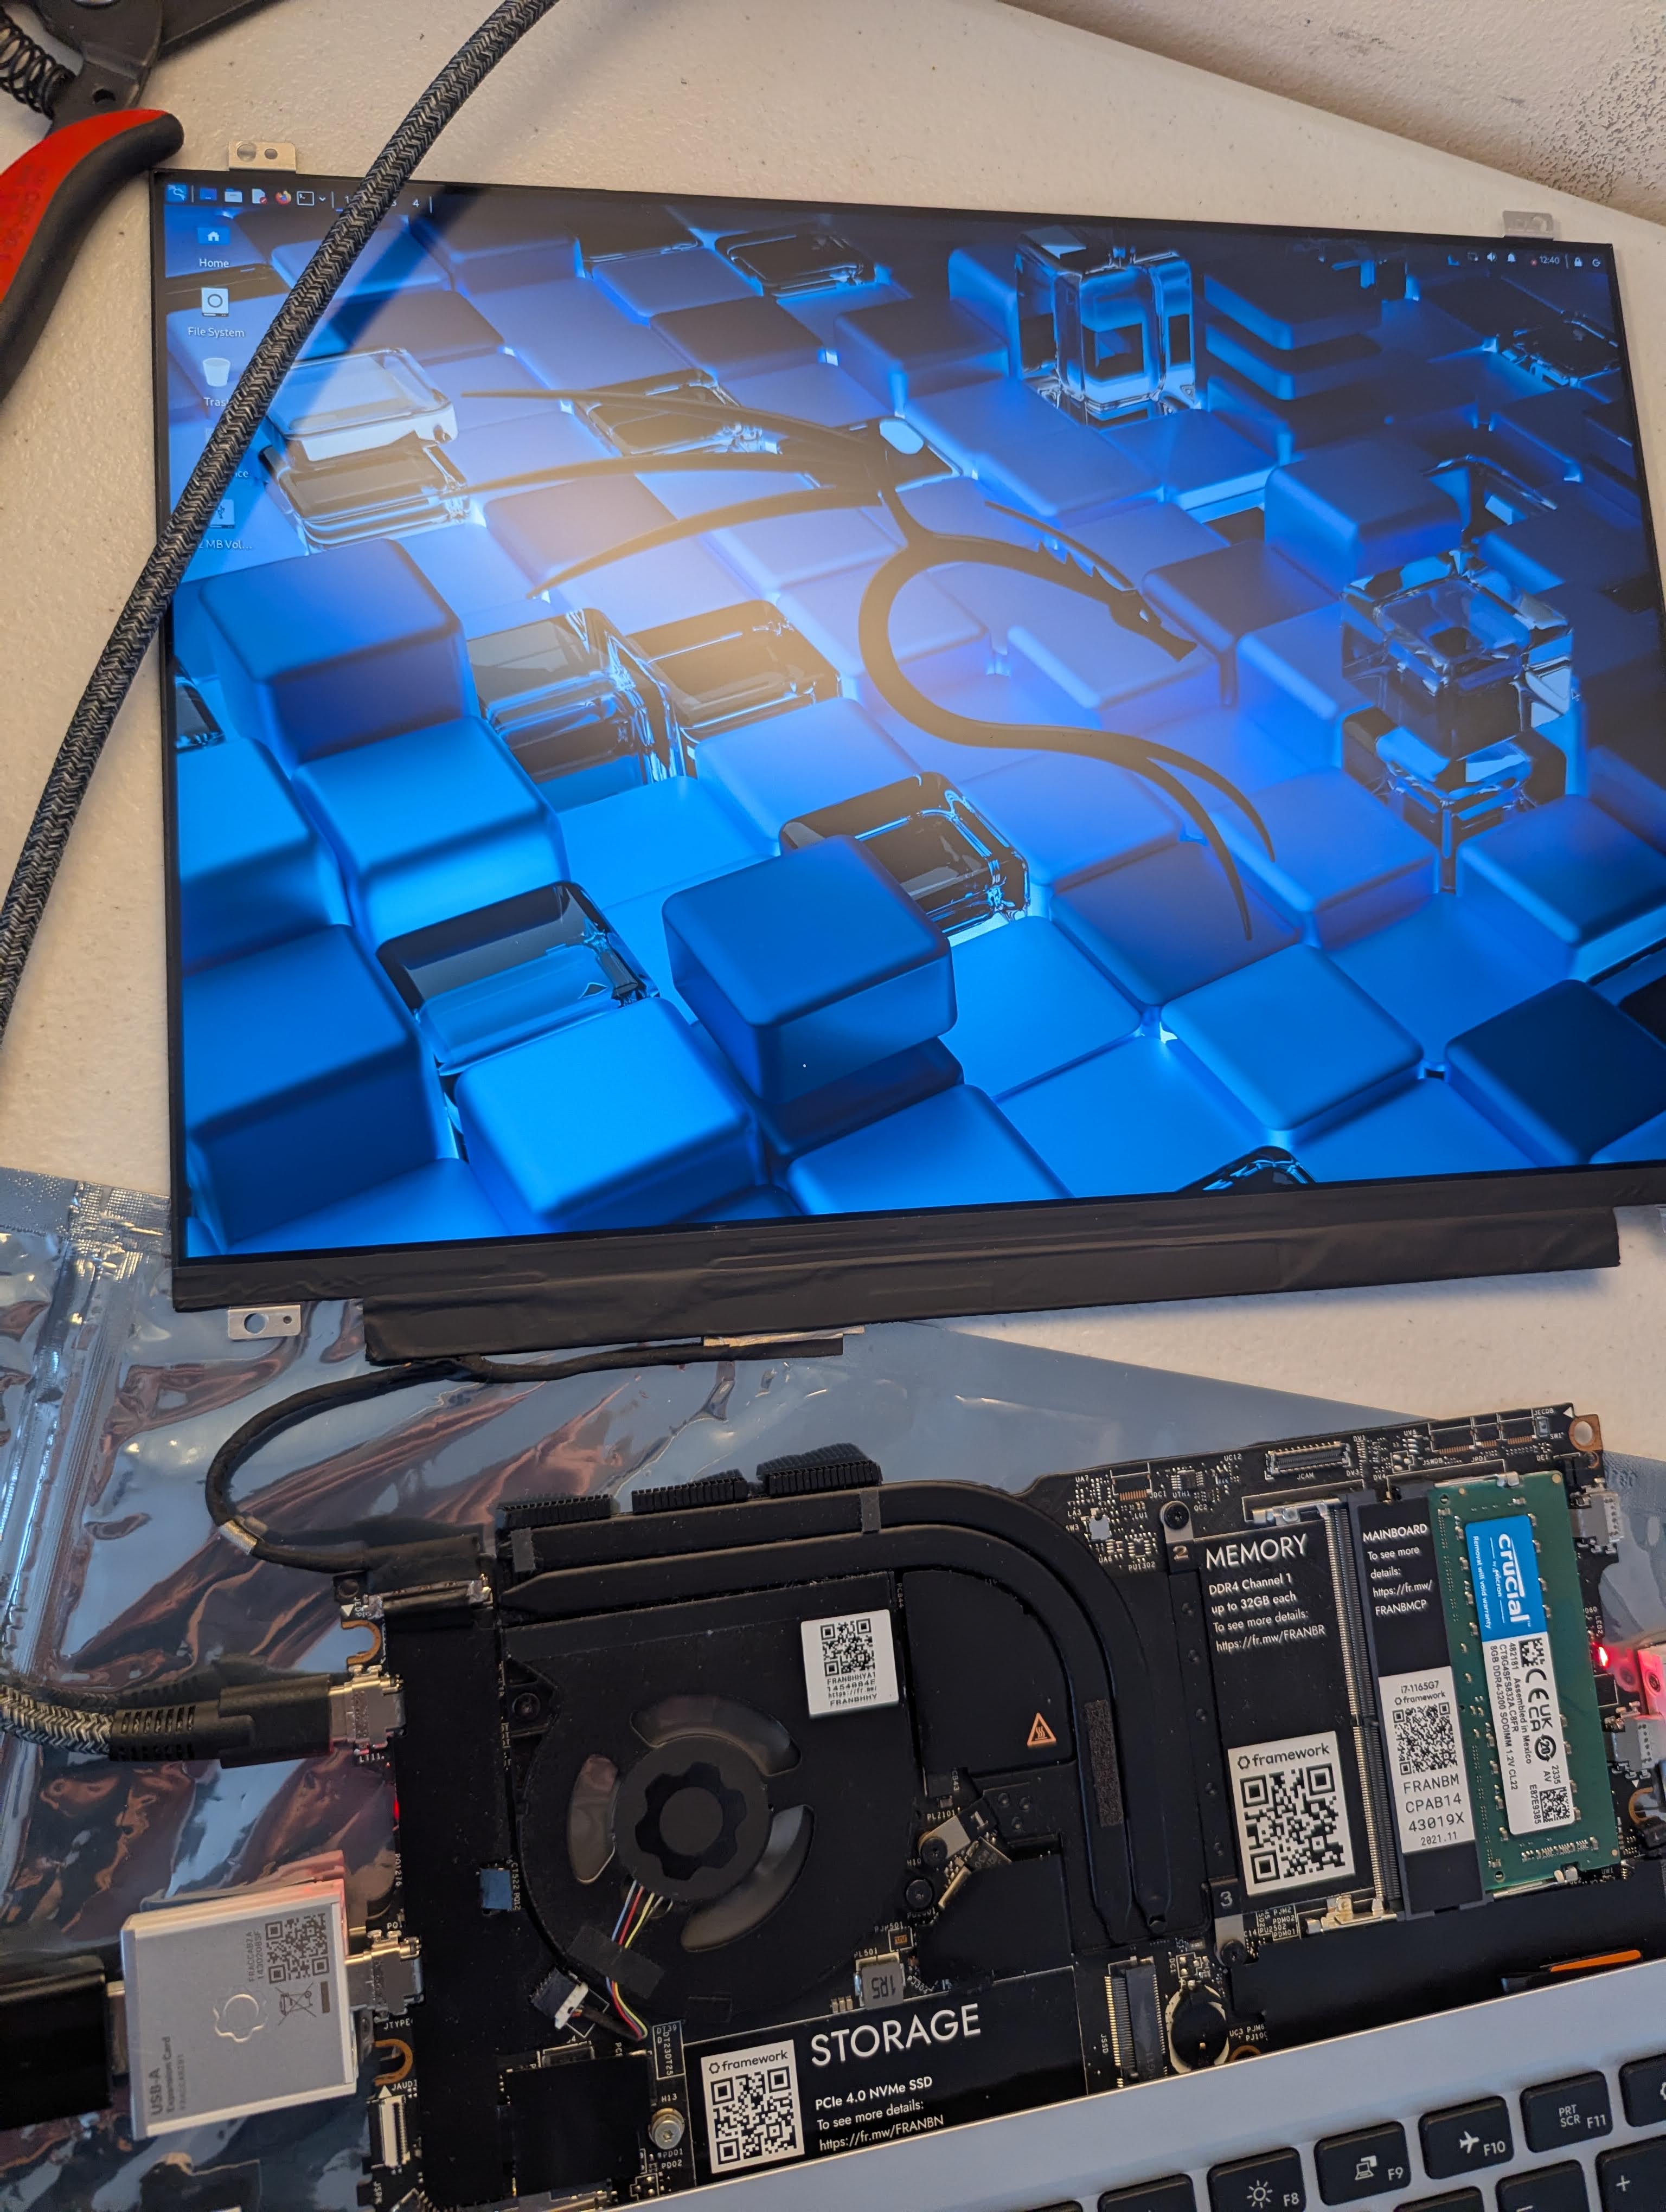
But it worked! I was so excited I didn’t take a picture so this one is from later when I’d reassembled the laptop.
Now, I was still missing both the a battery and a hard drive so I ordered those along with the clear purple bezel you can see in the image above, and some other parts, so that I can run the laptop and test out the rest of the functionality.
I also made a usb thumb drive to boot off of in the meantime and everything appears to work! The display is a bit dodgy, some times it doesn’t turn on, but it isn’t consistent so there is more for me to diagnose there, but overall I am very happy with this project as I was able to get about 1.5 laptops repaired and working for the price of half of a laptop, plus the education that comes with it.
I haven’t written much about the other motherboard, the 11th gen, but after testing it also works very well. And only one of the three displays I got was broken, the other two have no apparent issues, no dead or stuck pixels etc.